JavaScript Timer with Start/Pause/Stop Button

JavaScript Timer with Start/Pause/Stop Button

Timer

<html>

<head>

    <title>JavaScript Timer with Start/Pause/Stop Button</title>

</head>

<body>

    <br />

    <div style=”text-align: center”>

        <span style=”font-size: 11px”>HH:MM:SS</span><br />

        <label id=”hours”>

            00</label>:<label id=”minutes”>00</label>:<label id=”seconds”>00</label>

        <br />

        <input type=”button” id=”gobutton” onclick=”startTimer()” value=”Start”>

        <input type=”button” id=”pausebutton” onclick=”pauseTimer()” value=”Pause”>

        <input type=”button” id=”stopbutton” onclick=”stopTimer()” value=”Stop”>

        <br />

        <label id=”totalTime”>

        </label>

    </div>

    <br />

    <script type=”text/javascript”>

        var hoursLabel = document.getElementById(“hours”);

        var minutesLabel = document.getElementById(“minutes”);

        var secondsLabel = document.getElementById(“seconds”);

        var totalTime = document.getElementById(“totalTime”);

        var totalSeconds = 0;

        var totalMinutes = 0;

        var totalHours = 0;

        var counter;

        var timerOn;

        var htmlResets;

        var totalMills = 0;


        function startTimer() {

            if (timerOn == 1) {

                return;

            }

            else {

                counter = setInterval(setTime, 10);

                timerOn = 1;

                htmlResets = 0;

            }

        }


        function pauseTimer() {

            if (timerOn == 1) {

                clearInterval(counter);

                timerOn = 0;

            }


            if (htmlResets == 1) {

                hoursLabel.innerHTML = “00”;

                minutesLabel.innerHTML = “00”;

                secondsLabel.innerHTML = “00”;

                totalMills = 0;

                totalSeconds = 0;

                totalMinutes = 0;

                totalHours = 0;

            }

            else {

                htmlResets = 1;

            }

        }


        function stopTimer() {

            totalTime.innerHTML = “Time Recorded: “ + hoursLabel.innerHTML + “:” + minutesLabel.innerHTML + “:” + secondsLabel.innerHTML;

            hoursLabel.innerHTML = “00”;

            minutesLabel.innerHTML = “00”;

            secondsLabel.innerHTML = “00”;

            totalMills = 0;

            totalSeconds = 0;

            totalMinutes = 0;

            totalHours = 0;

            clearInterval(counter);

            timerOn = 0;

        }


        function setTime() {

            ++totalMills;

            if (totalHours == 99 & totalMinutes == 59 & totalSeconds == 60) {

                totalHours = 0;

                totalMinutes = 0;

                totalSeconds = 0;

                hoursLabel.innerHTML = “00”;

                minutesLabel.innerHTML = “00”;

                secondsLabel.innerHTML = “00”;

                clearInterval(counter);

            }

            if (totalMills == 100) {

                totalSeconds++;

                secondsLabel.innerHTML = pad(totalSeconds % 60);

                totalMills = 0;

            }

            if (totalSeconds == 60) {

                totalMinutes++;

                minutesLabel.innerHTML = pad(totalMinutes % 60);

                totalSeconds = 0;

            }

            if (totalMinutes == 60) {

                totalHours++;

                hoursLabel.innerHTML = pad(totalHours);

                totalMinutes = 0;

            }

        }


        function pad(val) {

            var valString = val + “”;

            if (valString.length < 2) {

                return “0” + valString;

            }

            else {

                return valString;

            }

        }

    </script>

</body>

</html>

Setup Project Deployment of Windows Form Application

Setup Project Deployment of Windows Form Application

Create ASP.NET Windows Forms Application in Visual Studio 2010 and gives the functionality enable user to automatically install and deploy it on servers via an easy setup program.

Create Windows Form Application Project

Create a new Windows Forms Application project:

select File->New Project-> Windows Forms Application

Add Setup Project to the Solution

Choose the File->Add->New Project menu item to add one into your solution:

Note that the “Setup Project” type shows up under the “Other Project Types->Setup and Deployment->Visual Studio Installer” node in the New Project dialog above. Name it whatever you want and hit ok. It will then show up in your solution explorer as a separate project.

Add Project Output in Setup

Our next step will be to configure the setup project to take the compiled assemblies project and use them as inputs within our setup project. To-do this, right-click on the web setup project node in the solution explorer and choose the “Add->Project Output” context menu item:

A dialog will then appear allowing us to select which project in the solution, and which of its project contents, we want to add to the setup package:

For ASP.NET Projects it is really important that we select both the “Primary Output” (which are the compiled assemblies for the \bin directory) as well as the “Content Files” within this dialog.

Add File System in Setup

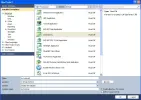
By default, the setup project will copy both of these items into the root of the target Application Folder that the setup project will create. You can see that it is configured this way by opening up the “File System” view within the setup project (right click on the setup project root and choose View->File System):

File System will show you 3 folders:

Application Folder:  Contained the files installed in application folder in selected location.

User’s Desktop: Contained the files/shortcuts placed on desktop.

User’s Programs Menu: Contained the shortcuts in program menu.

Create Shortcut of your exe file:

Select Application Folder->Right Click on Primary output from [APPLICATION NAME] (Active), Select Create Shortcut to Primary output from [APPLICATION NAME] (Active)

Create Shortcut and set icon to exe file on desktop:

Right click on “Create Shortcut to Primary output from [APPLICATION NAME] (Active)” select properties windows, select Folder to User Desktop.

You can set icon to shortcut from icon property

Add GAC enabled File to GAC Assemble on Machine:

Right Click on File System on Target Machine, Add Global Assembly Cache Folder in it.

When Global Assembly Cache Folder is added under File System on Target Machine then select Application Folder, it will show you all the dll files, now drag the dll files on Global Assembly cache Folder which you want to move to GAC of machine, when setup is installing it will automatically installed on GAC of machine.

Make GAC file to permanent reside on machine or remove at the time of un-installation of setup

Select dll file and open properties window of that dll, Set Permanent property of dll file to True which make sure that after un-installation of setup dll will not remove from the machine, by default it is False and when user un-install the setup it will automatically uninstall the dll from machine without check its dependencies which will cause other applications who already using that dll.

Set Properties Settings for Setup project:

Now there are some other settings that are up to you to change.

Make sure you clicked on the “SetupProject” in the solution explorer.

In the properties toolbox, you can edit the “AddRemoveProgramsIcon”, the “Author”, “Descriptions”, “Manufacture”, “Target Platrorm”, “InstallAllUser” etc.

Change Remove Previous Version to True which ensure that while installing the setup again it will remove the previous version automatically form the machine and install new setup.

Set Prerequisties of the setup:

Right click on setup project, select properties from dialog box:

Configure the “SetupProject” to include the Prerequisites

Now we will configure our Setup Project to include the prerequisites

1. In the solution Explorer search for “SetupProject” and right click on it.
2. Select Properties
3. Click on “Prerequisites”.
4. The first check box, “Create setup program to install prerequisites components” on top should be ticked, if not, tick it.
5. Now make sure that you tick “Windows Installer 3.1” and “.Net Framework 3.5” in the “Choose which Prerequisites to install” list.
6. Further down in the window there are 3 options. Make sure the “Download prerequisites form the same location as my application” is selected.
7. Close the window.
8. Close the Properties window.

NOTE: Setup will check the prerequisites already installed on machine or not while installing, it is not installed then setup will install the prerequisites on machine from the location set under “Specify the install location for prerequisites”, because of we have selected “Download prerequisites form the same location as my application”, setup will install the prerequisites from the setup folder.

Build and Run Setup Project to the Solution

To build the web-setup project we can right-click on the web setup project node within the solution explorer and choose the “Build” option:

Now that we have all the basic required settings, we can test the application.
1. Build your solution
2. Select Setup Project in the solution explorer and right click it.
3. Select Build
4. Browse to your project debug folder and double click on setup file.

Our “MyApplicationSetup” project created a new MyApplicationSetup.msi Windows installer file and compressed and packaged the contents of our ASP.NET Web Application (note: in the web setup project properties dialog you can choose whether the compression algorithm used is optimized for size or speed).

Very Important: Because setup projects take awhile to build, they are by default marked not to build as part of the solution.  What this means is that you need to right-click on them and explicitly do a build in order for them to be recompiled.  Be careful to-do this when you make and test changes – otherwise you’ll be running the previously compiled version and not the one with your latest code!

To test it, we can right-click on the web setup project within the solution explorer and choose the “Install” option to install it (or alternatively launch it outside of VS by running it):

This will launch a standard Windows installer and walk the user through installing the application on IIS:

Select Folder location where to install the application:

Once installed the application will also show up in the standard “Add or Remove Programs” utility within the Windows Control Panel:

You can remove the application either by running uninstall from the control panel utility, or (at development time) by right-clicking on the web setup project node within the VS Solution Explorer and selecting the “Uninstall” menu item. This will cause all installed files to be removed from disk.

Update the Wizard UI of the Setup Project

By default the Windows installer created by a web setup project has some default instruction strings and banner images for the setup:

You can change this and customize the screens by right-clicking on the web setup project node in the VS solution explorer and selecting the “View->User Interface” context menu item):

This will then bring up a screen that shows the list of screens to be displayed during setup:

Unfortunately there isn’t a forms-designer that you can use to override the screens above.  However, you can select a screen, and then go to the property grid to customize its CopyrightWarning and WelcomeText:

Add Dialog during Start of application

Add Dialog Box

You can select any welcome image at the time of begin of installation of setup in splash dialog box:

For custom Actions Please refer:

It’s often necessary to add your own code to a Visual Studio setup project, which is accomplished using custom actions. Custom actions are in contrast to the standard actions that Windows Installer performs during an installation. Please refer the link to use custom actions in yout project.

http://msdn.microsoft.com/en-us/library/d9k65z2d(v=vs.100).aspx

Creating an ActiveX control in .Net using C# (via Haseeb Akhtar’s Blog)

Nice Article

Creating an ActiveX control in .Net using C# Create a new Class Library project in Visual Studio 2010 Start-Run-devenv or Click- Microsoft Visual Studio 2010. After starting Visual Studio click File – New – Project and select Class Library under C#. Call the project 'AxControls' and click OK. Create a new class that inherits from UserControl Rename 'Class1.cs' to "HelloWorld.cs", making sure to rename the … Read More

via Haseeb Akhtar's Blog

“ACCESSORS AND MUTATORS in Asp.Net” (via Haseeb Akhtar’s Blog)

Nice and very helpfull article, Thanks haseeb

Accessors:- 1. Read or obtain the value of private member variables. This must be done in a manner that maintains the integrity of the private member data. 2. Display the value of private member variables. The displayed information should be user friendly, i.e., formatted in a fashion easily readable and understandably by the user. 3. Print the value of private member variables. When an inappropriate attempt is made to change the value of a priva … Read More

via Haseeb Akhtar's Blog

Json

What is JSON?

JSON stands for JavaScript Object Notation which is a data structuring format that is extremely clean and has lightweight data-interchange format. It provides a simple data format for the exchange of information between the browser and server.  Even though JSON is native to JavaScript (as in, it can be turned into an object directly by JavaScript), it is quite easy to handle with other languages, making it an ideal replacement of XML when JavaScript is involved with the exchange of data (i.e. ajax). It has the potential to store any data type of information. We can store strings, integer, float, arrays, function or even other objects inside as per our requirement and JSON does not even bother about the type of data.

Advantages

  • Lightweight data-interchange format
  • Easy for humans to read and write
  • Easy for machines to parse and generate
  • JSON can be parsed trivially using the eval() procedure in JavaScript
  • JSON Supports: ActionScript, C, C#, ColdFusion, E, Java, JavaScript, ML, Objective CAML, Perl, PHP, Python, Rebol, Ruby, and Lua.

Why JSON

  • JSON is easy to write. It is just like creating and accessing class in JavaScript in object notation
  • If you like HashTables, you like to work with JSON.
  • JSON is just key: value pairs assigned within an object.
  • JSON is very fast.
  • It is easy to understand and can be integrated in any web application easily.
  • Better organized data if prepared in well mannered way.

Syntax

The JSON Syntax is the convention which you will use it to generate data, it’s near to the C family language, so it can be parsed easily in the C family languages.

Example:

var employees = {
“accounting” : [   // accounting is an array in employees.
{ “firstName” : “John”,  // First element
“lastName” : “Doe”,
“age” : 23 },{ “firstName” : “Mary”,  // Second Element
“lastName” : “Smith”,
“age” : 32 }
], // End “accounting” array.
“sales” : [ // Sales is another array in employees.
{ “firstName” : “Sally”, // First Element
“lastName” : “Green”,
“age” : 27 },

{ “firstName” : “Jim”,   // Second Element
“lastName”  : “Galley”,
“age” : 41 }
] // End “sales” Array.
}; // End Employees

A JSON object begins with “{“ left brace and ends with “}” right brace
•object { members } – (Squiggly brackets act as ‘containers’)

Arrays put the arrays between [ ]
•array [ elements ]  – (Square brackets holds arrays)

Each name is followed by: (colon) and the name/value pairs are separated by “,” (comma)
•{key: value , key: value}  (elements can be string, number, object, array, true, false, null)

A JSON object is an unordered set of name/value pairs separated by “:” (colon)
•key: value

JSON and JavaScript

  • JSON is a subset of the object literal notation of JavaScript
    • JSON can be used in the JavaScript language with no muss or fuss

Before you use JSON, you must understand the shorthand construction of arrays in javascript. This is of course assuming you have an understanding of what an array is and how it works.

var myFruits = [“apple”,“orange”,“banana”];

I have constructed the object myFruits that is an array of fruits. Because I used the [ ] brackets, these array items will be automatically assigned a key based on an incrementing number, starting with 0.

alert(myFruits[0]); // Alerts “apple”
alert(myFruits[1]); // Alerts “orange”
alert(myFruits[2]); // Alerts “banana”

The array items are now accessible through objectName[key], or in the first example: myFruits[0] which returns “apple”, as apple was the first item of the array list.

var fruitColors = {
“apple”:“green”,
“banana”:“yellow”,
“orange”:“orange”
};var students = {
121:“Scott”,
131:“John”,
141:“Mary”
};

In this code, I look at the slightly more complex construction that allows you to specify both keys and values for the array. By using the { } brackets, you are able to do this. There are two variants displayed here that shows how you can use keys that are either numeric, or alphanumeric. Take note of the use of quotations for alphanumeric keys.

alert(fruitColors[‘apple’]); // Alerts “green”
alert(fruitColors[‘banana’]); // Alerts “yellow”
alert(fruitColors[‘orange’]); // Alerts “orange”
alert(students[121]); // Alerts “Scott”
alert(students[131]); // Alerts “John”
alert(students[141]); // Alerts “Mary”

Just as in the first example, the object items are accessed through the format of objectName[key]

JSON Examples

Here is a very simplesingle-dimension object:

{ “title”: “JavaScript Techniques”, “pages”: 384, “edition”: “978”, “id”: 2937 }

Another simple single-dimension example (note the use of [ ] brackets to signify auto-generated keys):

•[“banana”, “apple”, “orange” ]

Here is a relatively simple multi-dimensional object using both [ ] and {} brackets:

•var objDetails = {” bindings “: [
{“name”: “Mr. Williams”, “age”: 35,  “phone”: “978-159-059″ },
{“name”: “Mr. John”,       “age”: 28,  “phone”: “978-047-109” }
]

In this example, a JSON JavaScript object is created containing a single member “bindings”, which contains an array containing three objects.

Members can be retrieved using dot or subscript operators

alert(objDetails.bindings[0]. name) // Alerts ” Mr. Williams ”
alert(objDetails.bindings[1][“ name”]); // Alerts ” Mr. John”

Text to Object Conversion in JavaScript code

var myObject = eval(‘(‘ + myJSONtext + ‘)’);

  • To convert a JSON text into an JSON object, use the eval() function
    • eval() invokes the JavaScript compiler
    • Since JSON is a proper subset of JavaScript, the compiler will correctly parse the text and produce an object structure

The eval function is very fast. However, it can compile and execute any JavaScript program, so there can be security issues. The use of eval is indicated when the source is trusted and competent. It is much safer to use a JSON parser.

Security & JSON Parser

// Include http://www.json.orkg/json.js
var myObject = myJSONtext.parseJSON();
• eval() can compile and execute any JavaScript program, so there can be security issues (cross-site scripting)
∧Use eval() when the source can be trusted
• When security is a concern – the source cannot be trusted -, it is better to use a JSON parser
∧A JSON parser will only recognize JSON text and so is much safer

Object to Text Conversion

var myJSONText = myObject.toJSONString();

• You can convert JSON object into JSON text
• JSON does not support cyclic data structure
∧Do not give cyclical structures to the JSON stringifier


How to Generate/Send JSON Data at the Server Side

• Create JSONObject Java object
• Add name/value pairs using put method
• Convert it to String type using toString method and send it to the client with content-type as “text/xml” or “text/plain”

myString = new JSONObject().put(“JSON”, “Hello,World!”).toString();
// myString is {“JSON”: “Hello, World”}

How to Receive JSON Data at the Client Side

• JSON data is received as a string
• Calling eval() will generate JSON object in JavaScript code
∧var JSONdata = eval(req.responseText);
• Once you have JSON object, you can use . notation to access its properties
∧var name = JSONdata.name;
∧var address = JSONdata.addresses[3];
∧var streetname = JSONdata.addresses[3].street;

How to Generate/Send JSON Data at the Client Side

• Create JSON JavaScript object
• Use “POST” HTTP method in the open method of the XMLHttpRequest object
• Pass JSON JavaScript object in the send method of XMLHttpRequest object

var carAsJSON = JSON.stringify(car);
var url = “JSONExample?timeStamp=” + new Date().getTime();

createXMLHttpRequest();
xmlHttp.open(“POST”, url, true);
xmlHttp.onreadystatechange = handleStateChange;
xmlHttp.setRequestHeader(“Content-Type”, “application/x-www-form-urlencoded”);
xmlHttp.send(carAsJSON);

How to Receive JSON Data at the Server Side

• Read the JSON data as a String type
• Create JSONObject Java object from the string

String json = readJSONStringFromRequestBody(request);

//Use the JSON-Java binding library to create a JSON object in Java
JSONObject jsonObject = null;

try {
jsonObject = new JSONObject(json);
}
catch(ParseException pe) {
}

JSON Resources

• Introducing JSON : http://www.json.org
• JSON in JavaScript : http://www.json.org/js.html

Naveen Bhardwaj
naveen_b@assigncorp.com
http://www.assigninfo.com
http://www.assigncorp.com
http://www.bindaasbargain.com

Jquery

Jquery Selector Vs Javascript Selector.

jQuery, quite popular these days, has enabled us in developing more interactive and appealing websites. jQuery is a library that has facilitated us in building JavaScript webpages and web applications much more quickly and in an easy way. More often with jQuery you can write a single line of code to fulfill the requirement. jQuery is written in JavaScript, and is available  as a single .js file that you can link to your webpage. Your JavaScript code then accesses the library by calling various jQuery functions.

This article shares some best practices that can be considered with jQuery and Javascript selector. It throws light on the use of $(“#selector”) id selector used in jQuery and  document.getElementById(“id”) function used in Java Script and allows you to decide which one is better and suits your requirement

Java Script: GetElementById(“Id”);

  1. It returns the first element whose ID is specified by GetElementById. If no such element exists, returns null.
  2. It is supported by all browsers
  3. In IE8 GetElementById perform a case-sensitive match on ID attribute, but for IE7
    and previous versions this method performs a case-insensitive match on both ‘By Id’
    and ‘By Name’ attribute which shows unexpected results.
  4. GetElementById is very fast as compare to jQuery ID selector ($(“#id”))

jQuery: $(“#selector”); (Id Selector)

  1. Returns the first element whose ID is specified in selector. If no such element exists, returns null.
  2. It is supported by all browsers
  3. jQuery selector performs a case-sensitive match on ‘Id’ or ‘Class’ selector attribute on all browsers and shows accurate results.
  4. jQuery selector is very slow as compare to GetElementById in Java Script.

$(“# selector”) is not as simple as document.getElementById, because it exists in jQuery
framework. When you try to get an element this way, it wraps the whole jQuery object, all jQuery functions, properties, and different special cases associated with that element which makes it simple to read and easy to extend. But for some cases it has lead to bad performance.

This article shows that “GetElementById” selector in Java Script is very fast as compared to “$(“#Id”)” selector in jQuery but there is one drawback with GetElementById that most recent browsers does not support case-sensitivity for e.g IE6, IE7 and thus shows you unexpected results.

Naveen Bhardwaj
naveen_b@assigncorp.com
http://www.assigninfo.com
http://www.assigncorp.com
http://www.bindaasbargain.com